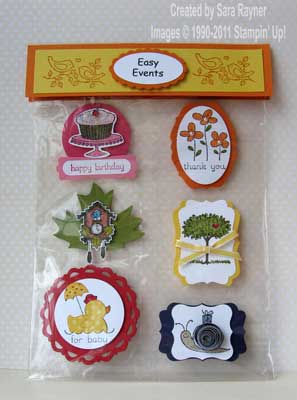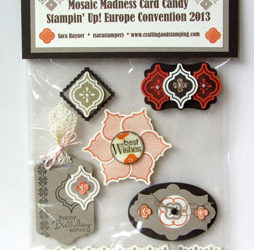
Here’s the first set of card candy that I made for swapping at convention. This stamp set has something for all occasions and I figured the candy is likely to be used on separate cards. So instead of sticking to one colour combo for all the candy, I opted for the full range (well almost) of Brights to create a cheery pack.
For anyone who hasn’t come across it before, card candy is a handmade pack of little toppers, bagged and finished with a bag topper, to look just like the sets you can buy in craft shops. Card candy is a perfect low cost gift for a crafty friend and also great for making to sell at fairs and fetes, especially those attended by existing crafters.
I made 14 sets of this pack – most for swapping, though a couple of packs were gifts for my downline.

Recipe
Stamp set: Easy Events (W116958 or C123225)
Cardstock: Melon Mambo (119980), Regal Rose (108612), Pumpkin Pie (108601), Old Olive (106576), Daffodil Delight (121680), Real Red (106578), Concord Crush (121691), Whisper White (106549)
Ink: Black Stazon (101406), Pumpkin Pie (105216), SU Markers (119806)
DSP: 2010-2012 In Color Patterns Stack (117158), Brights Patterns Stack (117155)
Punches: Scallop Oval (119856), Large Oval (119855), Extra-Large Oval (119859), 1-3/4″ Circle (119850), Word Window (119857), Modern Label (119849), Decorative Label (120907), Curly Label (119851)
1/3″ Taffeta Ribbon: Daffodil Delight (119254)
Originals Die: Leaves 2 (113459)
Bigz L Die: Perfect Pennants (123126)
Sizzlits Die: Lots of Tags (114508)
Other: Dazzling Diamonds (102023), Fire Circle Brads (109110), Basic Pearls (119247), 6″ x 8″ Cellophane Bags (102210)
Tools: Big Shot (113439), Crystal Effects (101055), Bone Folder (102300)
I won’t cover how I made every single piece of candy, but if there are any that you’re not sure of, then leave me a comment and I’ll respond with an explanation.
Tomorrow I’ll share with you the swaps I got from Group 1, in return for this set.
Sara xx


What a wonderful idea. I am most defianately going to make these for my card and scrapbook friends. When you sold them at craft fairs. How much did you ask for them?
Kate
Will you please let me know where I can get instructions for making the actual sheet of card candy? I have seen that they are attached to a piece of was paper with glue dots but I think the presentation at convention this year used a different technique that looked more substantial and used dimensionals. Thank you so much. Lynne Campbell
Hi Lynne
There are probably a few ways but the way that I use is to put dimensionals on the back of the candy, leaving the backing paper in position. Then apply a small dot of Tombow multipurpose glue to the backing papers and glue them to my acetate sheet. That way when the candy gets peeled from the acetate, it will hopefully leave the backing paper stuck to the acetate sheet, exposing the sticky dimensional, all ready to stick to the card.
Hope that helps
Sara xx
Beautiful card candy – your swaps are just amazing Sara. It was wonderful to finally meet you at convention. X