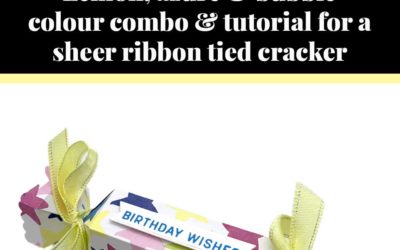
This little purse is perfect for a girlie gift of choccie or biscuits or similar. It’s made using the larger size of Labels Collection Framelit dies – here I used the second largest size.

Step 1 – die cut 2 large labels from your chosen cardstock.

Step 2 – Trim off the side of the label, right at the point where the design steps down (see pic). Repeat with the second label on the same edge.
 Step 3 – Score 1″ from the cut edge. Repeat with the second label.
If you wish to emboss your purse then add the embossing before moving to the next step.

Step 4 – Adhere the two labels together, overlapping the scored edges.
If the contents are to be enclosed only lightly, then they can be added at this stage and the purse decorated and closed.
 Step 5 – for a more secure enclosure, cut two strips of matching card 1″ x 3″ and score at 1″ and 2″ along the long edge on each piece.

Step 6 – Adhere one square of each strip to the inside edges of the purse, right against the scoreline.
 Step 7 – Fold over the purse and adhered the other squares to the opposite side to create a box.
Decorate as preferred.


0 Comments