Sorry I didn’t get time to post yesterday. I’m trying really hard to post every day now that I’ve got my new site up and running but yesterday was a really busy day as we had our Christmas Stamp-a-stack.
What a great day – thanks ladies, it’s always such a pleasure and such fun crafting with you all. And yes, I was a little optimistic with the timings again, though I have to say that we were easily on track at the halfway mark but the time seemed to run away from us after that. Some folks (just) managed to get all 12 cards and the bonus project completed and a some had to take a few bits home to finish assembling them. I’ll be emailing the instruction sheets out to all of you who attended later this morning, just as soon as I finish taking the photographs and add them in.
Meanwhile I have a guest crafter sharing a project with you today.
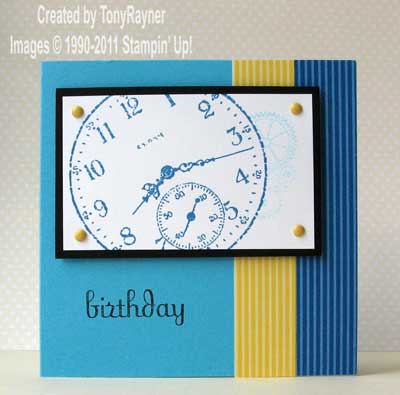
The guest is my hubby – Tony! And the card is the one he made for his Dad for his birthday. Tony decided to copy the layout I used for the male thank you card here because he loved the simplicity of it. All the other elements were then his. He asked how to achieve certain looks and I explained the techniques (and he’s used quite a few) but he did all the stamping and assembly. I think he deserves the credit for his work don’t you?

The card base is a 5″ square of Tempting Turquoise. He masked (technique 1) the main clock face after stamping it in Pacific Point and then used generational stamping (stamping off first to get a lighter colour – technique 2) for the cog wheels. The sentiment was selectively coloured (technique 3) with a marker (to leave out the oval frame) before huffing and stamping using the stamp-a-ma-jig for perfect placement (technique 4).
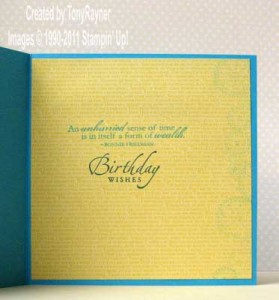
And there’s just as much attention to detail on the inside:

You can just make out the cog wheels stamped down the edge of the insert.
Right, off now to finish the photos for the Stamp-a-stack instructions and then get ready for my teammates coming round to plan for our craft stall in a few weeks time. Busy, busy, busy! (and all of it fun!)
Enjoy the rest of your weekend.
Sara xx


Wow Tony is becoming quite an accomplished stamper and card maker. Personally I might start to get worried as you might have to share your stash and products…….or he could buy more stuff (from you – of course) and he could share!!!