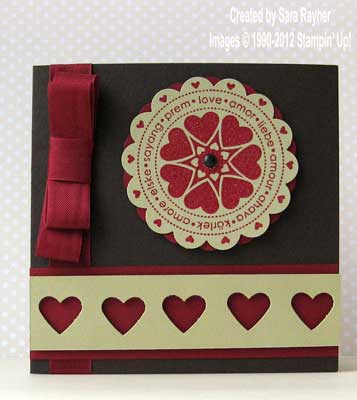
Although Valentine’s Day isn’t so very far away, this new stamp from the Mini Catalogue can work year round to send a message of love. And it fits beautifully within our new larger Scallop Circle punch (I can’t wait to try out a whole batch of projects I’ve got in mind for this).
Our Mini Heart punch is a shade larger than the hearts in the centre of the stamp and so provides a beautiful matching border for the card.

Recipe
Stamp set: Liebe, Love, Amour (W126129)
Cardstock: Early Espresso (121686), Cherry Cobbler (121681), River Rock (111852)
Ink: Versamark (102283)
Seam Binding Ribbon: Cherry Cobbler (120992)
Punches: 2-3/8″ Scallop Circle (118874), Small Heart (117193)
Other: Cherry Cobbler EP (122949), Neutrals Brads (119736)
Tools: Heat Tool (110197)
The card is a square of Early Espresso with a flat bow of Cherry Cobbler Seam Binding Ribbon secured around the left hand side. After stamping Liebe, Love, Amour in Versamark ink onto River Rock card it was heat embossed with Cherry Cobbler EP and punched out with the 2-3/8″ Scallop Circle. This was secured to another Scallop Circle, punched from Cherry Cobbler card, using an Early Espresso brad and then popped up on the card front with dimensionals. A strip of River Rock card was punched evenly with the Small Heart. A slightly wider strip of Cherry Cobbler card was adhered direct to the card front and the punched strip was popped up over the top with slivers of dimensionals.

Recipe
Stamp set: Liebe, Love, Amour (W126129)
Cardstock: Very Vanilla (106550)
Ink: Cherry Cobbler (119669)
Tools: Stamp-a-ma-jig (101049)
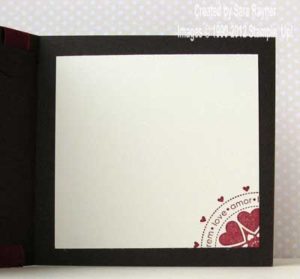
For the inside, the Liebe, Love, Amour was stamped off a Very Vanilla card insert using Cherry Cobbler ink. A Stamp-a-ma-jig was used to position it so that the “love” sentiment was shown in full.
I usually like to hide the ends of my ribbon behind an extra layer of card but for this card I’d already got different layers going in separate directions and with a range of shapes so I didn’t want to add any further layers. Drop by tomorrow and I’ll show how I tidied them up.
Sara xx


0 Comments