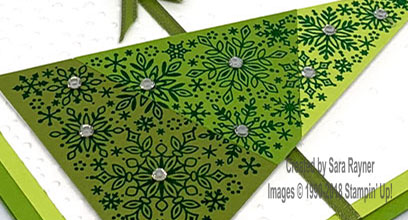
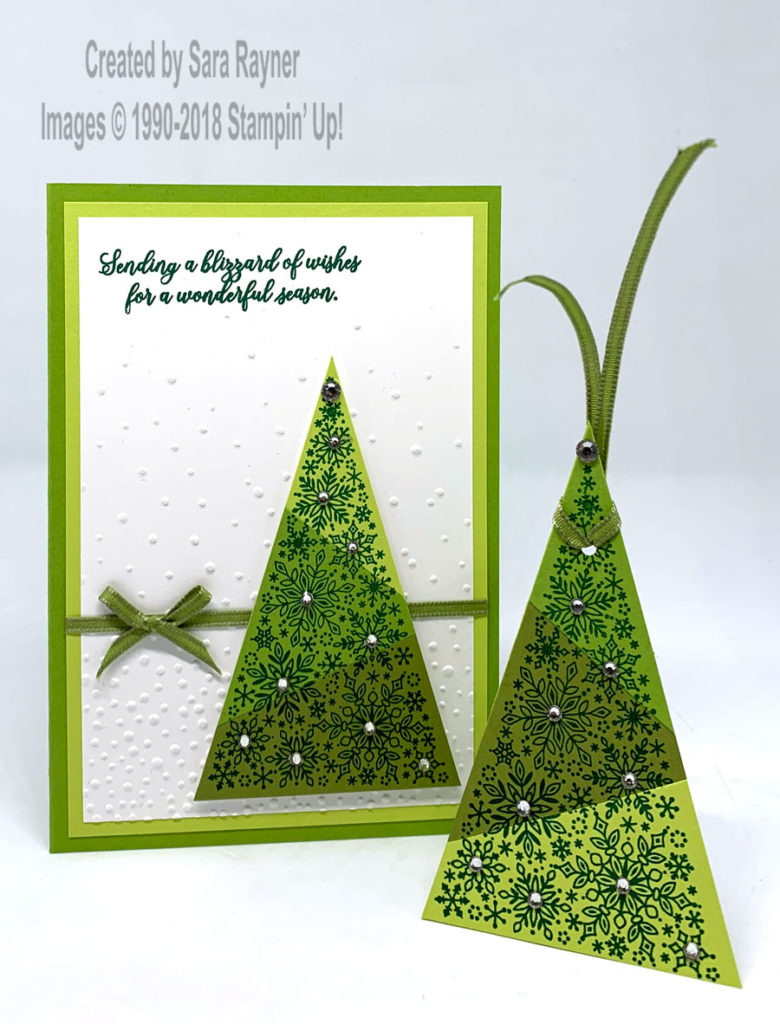
I recently shared this card (close up detail below) using a technique which I have called “colour chopping”. This is a very easy technique, perfect for beginners especially using the simple version I start with below, but it can also be changed up a little as I did with the Christmas tree card and I’ll walk you through it step by step.
There is a technique called colour blocking which comes from the artist Mondrian. I may cover that technique at a later date but you need some knowledge of the colour wheel for that. This is an even simpler version of a similar technique that just uses three shades of a single colour. They can be arranged to give an ombre effect, transitioning from a darker to a lighter colour (or vice versa) but they don’t have to be. Just mix and match to your suit your project.
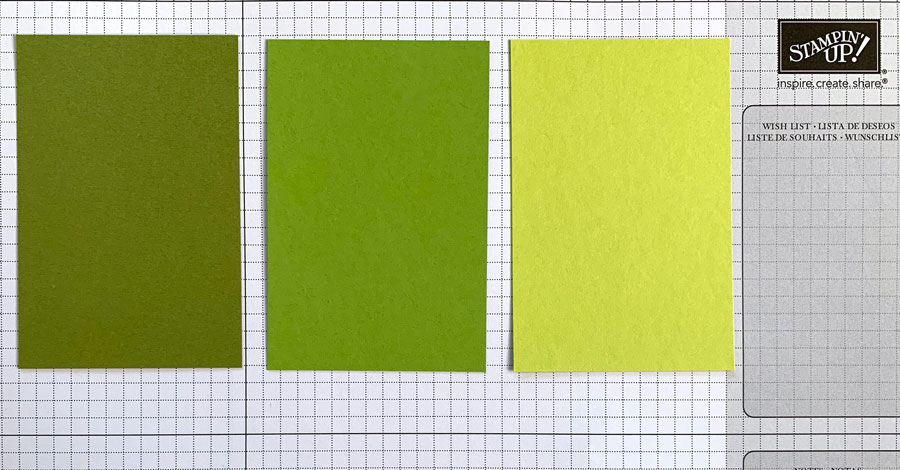
Step 1 – Choose your colours and your final shape. Here I selected three different greens (Lemon Lime Twist, Granny Apple Green and Old Olive) and decided to make my finished piece a simple rectangle of 2-1/2″ x 3-3/4″.
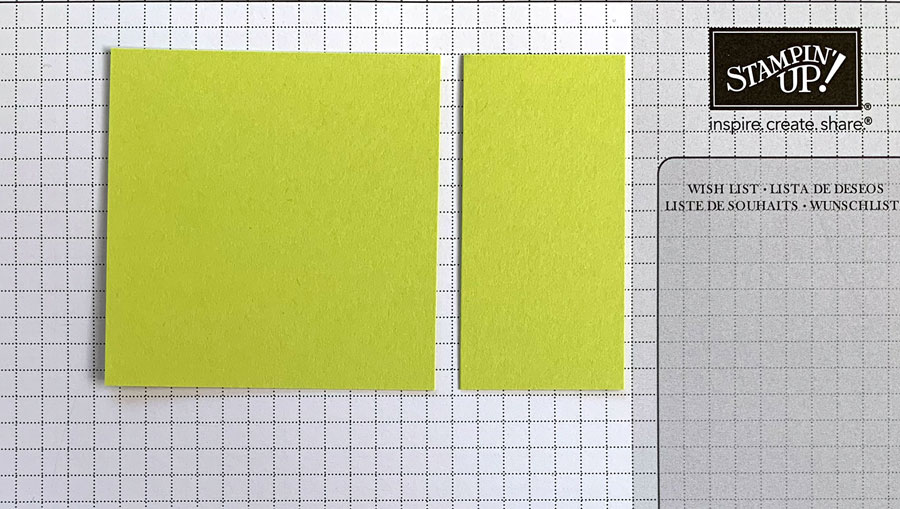
Step 2 – Cut your first piece away from the rest. Here I cut 1-1/4″ from the longest edge. Use this then as a template to repeat the cut on each of the other two colours. (One option is to place a cut piece over a full one and draw a pencil line along the cut edge as your guide).
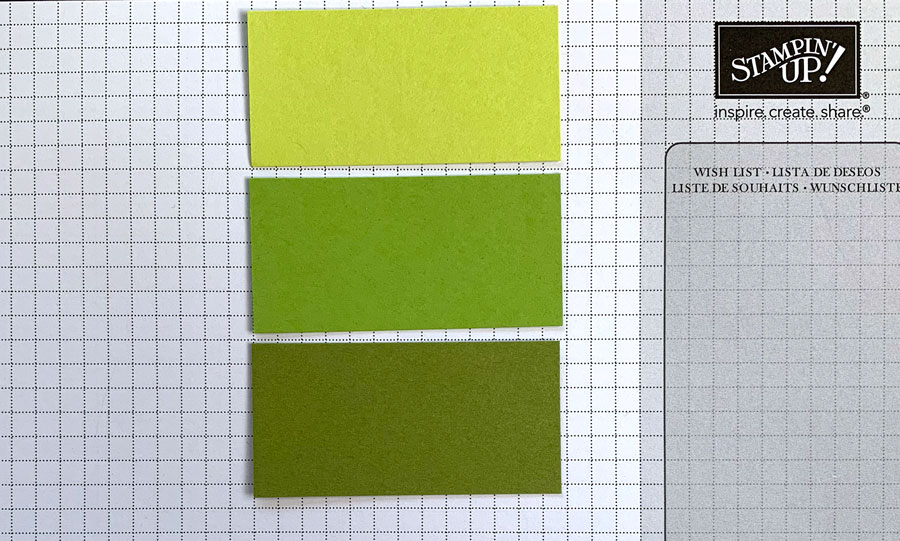
Step 3 – Cut your second piece away from the rest. (I cut another 1-1/4″ from the remaining piece, leaving a final 1-1/4″ piece). Use this then as a template to repeat the cut on each of the other two colours again. You will then end up with three pieces that can be arranged together (three times – ie. three x three).
Step 4 – To step this up a notch you can choose any simple geometric shape. For example I took a Christmas Tree stamp and measured to determine what size triangle I would need (in this case a rectangle of 2-1/2″ x 4″ cut to a point at the centreline of 1-1/4″).

Step 5 – Cut three identical triangles (or whatever shape you have chosen), make your first cut, then use it as a template to repeat the cut on the other two colour triangles. Make a second cut and again use it as a template to repeat the cut on the other two colour triangles.
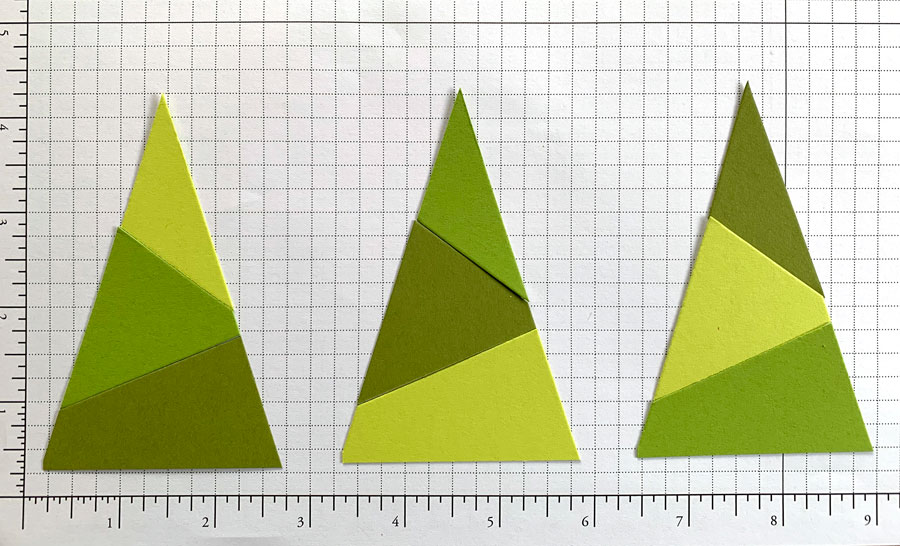
Mix and match the colours to assemble them into the same triangle, which you can then stamp on.
Thanks for stopping by.
If you have any questions then please leave me a comment or email me.
Sara xx


0 Comments