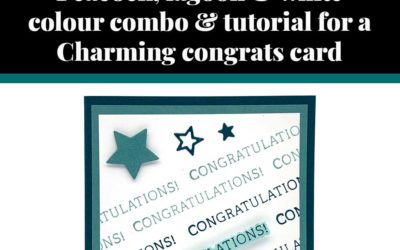
 Masking allows you add “layer” up your stamped design without adding any extra layers of card. It gives the illusion of having your images stacked one over another. All you need is some Post-it notes (or similar) and a pair of scissors.
Tip – once you’ve cut out and used your mask, stick it inside the stamp box so that it’s ready to use again in future.

Step 1 – Stamp your upper most image (ie. the one that you want to appear nearest to you) first. Then stamp the same image onto a Post-it note and cut out carefully allowing a tiny margin all round the image. This is your mask.

Step 2 – Position the mask exactly over the top of the original image. Tip – this flower isn’t symmetrical and so I looked for an unusual part of the design (here it’s one petal with two slivers of petals on either side) and marked it with a pen so I can use it to help me line the flowers up.

Step 3 – Stamp your next image, overlapping them either a little or a lot, as you prefer for your design.

Step 4 – Move the mask over to the next image, or create a second mask and repeat step 3. I used a second mask here as I wanted to stamp close to both of the original flowers.

Step 5 – Keep stamping, covering the image with a mask and stamping again as required to build up your image.


0 Comments