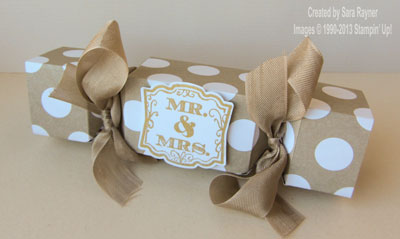
These crackers make great party or wedding favours (see our Christmas version here).
I’ve seen a few videos on youtube using the Envelope Punchboard (133774) to make them but most start with a piece of paper around 8″ x 6-1/2″ which means that you can only get one from a sheet of 12″ x 12″ DSP. Being a true yorkshire woman I like to make my supplies go further and so adapted the design to use a starting piece that is 6″ x 5-1/2″ – so you can get four of these crackers from one sheet of paper with a sliver left over for decoration 
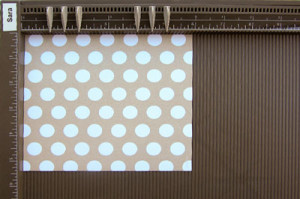 Step 1 – Start with a piece of DSP 6″ x 5-1/2″. With the 6″ side across the top, score at 1″, 1-1/2″, 2″, 4″, 4-1/2″ and 5″.
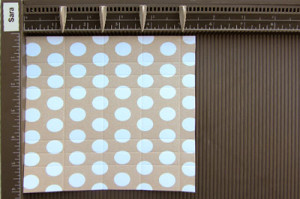 Step 2 – Rotate the paper and with the 5-1/2″ side across the top, score at 1-1/4″, 2-1/2″, 3-3/4″ and 5″. Prefold along all the score lines.
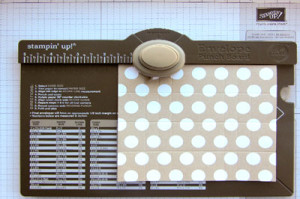
Step 3 – Turning the paper so that the 6″ is across the top again, fold at the first horizontal scoreline, line up at the 1-1/2″ mark on the envelope punch board and punch.
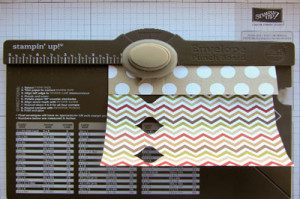
Step 4 – Unfold, refold at the next scoreline, line up at the 1-1/2″ mark on the envelope punch board and punch. Repeat all the way down the score lines. Punch also at the wider outside edge (see pic below for how the punched areas are positioned).
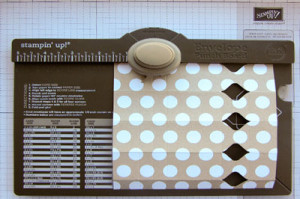
Step 5 – Flip the paper over and repeat on the other side, lining up on each scoreline again at 1-1/2″.
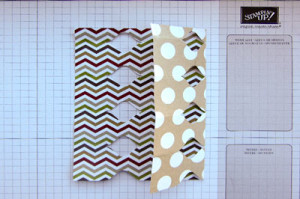
Step 6 – With your paper right (preferred) side down and the 6″ along the top, fold inward along the inner most vertical scoreline, just beyond the punched area. Fold outward along the scoreline running down the punched area and then fold inward again along the outer most vertical scoreline, just beyond the punched area.
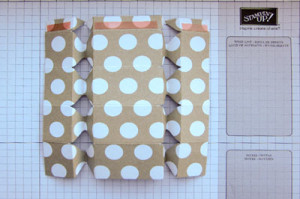 Step 7 – Repeat on the opposite side. Flip the paper back over to the right (preferred side) and apply adhesive to the tabbed edge (the narrowest outer edge), keeping the adhesive close to the scoreline.
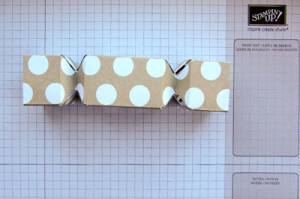
Step 8 – Roll/fold the edges together and adhere together to form the cracker.
 Step 9 – The ends of the cracker do leave a small opening so it’s best not to fill with anything too small. Alternatively, punch/cut a small square and use to “plug” the ends. Decorate your cracker as desired.


Thankyou very easy to follow
Glad it helped Brenda. Thanks for the feedback 🙂
thank you for all the explications even if for me french it will be better in cm lol
Thank you Sara
made my trial one today
Shirley ,