
As you read this, I’ll either still be at our Stampin’ Up! training event or will be driving back. 🙂
I’m sure that I’ll have plenty of swaps to share with you in a few days time and maybe a bit of news too, but for now I’ll show you the swaps that I made to give to others.
The first was a Kind & Cozy Circle flip card.
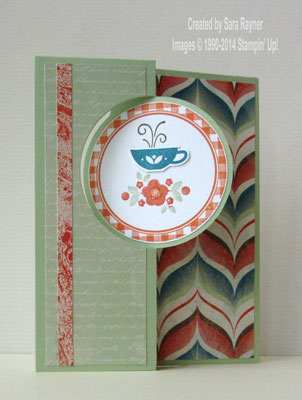
The card base is a Circle thinlit (133480) of Pistachio Pudding. It was matted front and inside back with different patterns of Venetian Romance DSP (130144) and trimmed with a very narrow strip of another pattern of the same, on the front. The gingham circle frame from Kind & Cozy (Wood 129123 or Clear 129126) was stamped in Tangerine Tango onto Whisper White card and punched out with the 2-1/2″ Circle (120906). Soft Suede ink was used to stamp the teacup from the same set, within the circle. Tangerine Tango and Pistachio Pudding markers were used to colour the flowers direct to stamp and then huff and stamp them below the teacup. The circle was adhered direct to the from of the flip aperture. Dazzling Details (124117) were applied over the flowers for a little sparkle. After stamping the teacup again onto a scrap of Whisper White card with Island Indigo ink, it was cut out by hand and popped up over the original teacup with a sliver of dimensional.
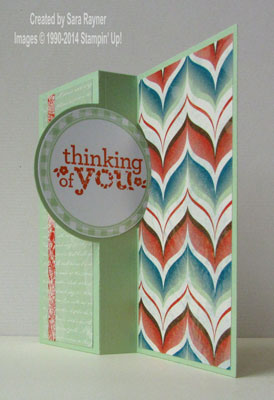
For the other side of the flip aperture, the gingham frame was stamped again onto Whisper White card, this time with Pistachio Pudding ink. The flowery sentiment from Kind & Cozy was stamped in the centre in Tangerine Tango ink then the circle punched out with the 2-1/2″ Circle and adhered direct.
I made a different version of the Circle thinlit card, this time adding a few more framelit elements that come with the card base and mixing up the stamp sets a little more.
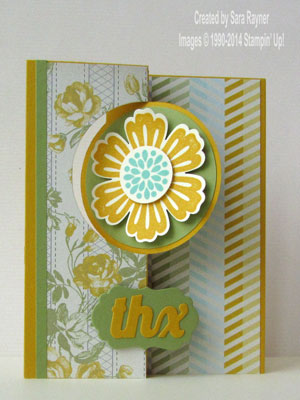
The card base is a Circle thinlit (133480) of Crushed Curry. It was matted front and inside back with different patterns of Afternoon Picnic DSP (131390) and edged with a very narrow strip of Pear Pizzazz card, on the front. A 2-1/2″ Circle (120906) punched from Pear Pizzazz card was adhered to the front flip aperture. The more solid petaled flower from Mixed Bunch (Wood 128442 or Clear 125537) was stamped in Crushed Curry ink onto Very Vanilla card and punched out with the Blossom (125603). After shaping the petals of the flower over a bone folder it was then popped up on a dimensional in the centre of the circles. The flower centre was stamped in Coastal Cabana ink onto Very Vanilla card, punched out with the 1″ Circle (119868) and popped up again on a dimensional. Extra framelits come in the Circle Thinlit pack and the “thx” sentiment was die cut from Crushed Curry card. This was adhered direct to the label, die cut from Pear Pizzazz card, which was then popped up, on one side only, on the front of the card.
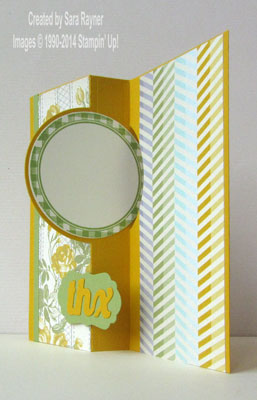
For the message side of the flip aperture, the gingham frame from Kind & Cozy (Wood 129123 or Clear 129126) was stamped onto Very Vanilla card with Pear Pizzazz ink. It was punched out with the 2-1/2″ Circle and adhered direct.
The Circle thinlit cards took quite some time to put together, so I also made a few quick swaps – when you’re looking for ideas for workshop make and takes you don’t want something too complicated or time consuming.
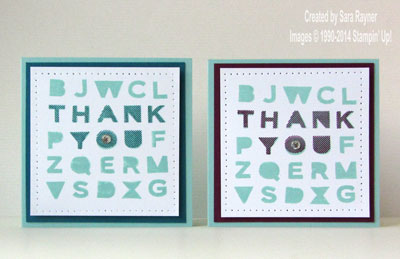
The details for these cards were shared earlier this week when I first got to play with these photopolymer stamps. (‘Fraid this particular set is sold out now!)
Thank you to everyone who swapped with me today, I look forward to sharing pix of your creations here soon.
Sara xx


Lovely to see you again and get a catch up yesterday Sara… And thanks for your awesome swap card… I am now so gutted that I did not get the alphabet stamps!!!