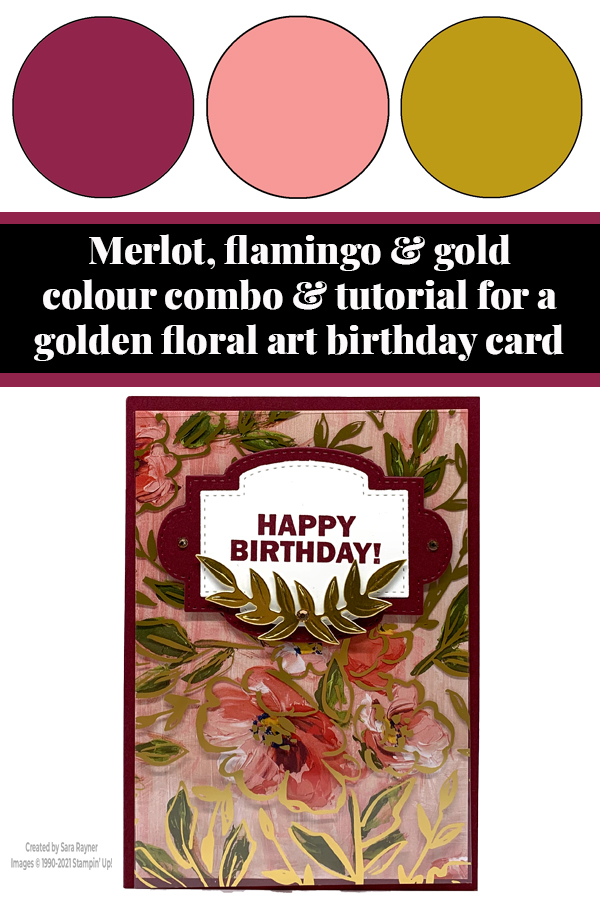
Today’s tutorial is for a golden fine art floral birthday card. It provides a sneak peek of both the Fine Art Floral DSP and the Golden Garden Designer Specialty Acetate. These are both from the January – June Mini Catalogue. It also uses one of our upcoming Sale-a-bration freebies; the Approaching Perfection stamp set, for the sentiments.
Each week over on my Facebook page (please pop over and Like or Follow) I choose a product pick of the week to feature. This week, it’s the upcoming Fine Art Floral DSP (available from tomorrow). I’ll have a selection of tutorials for you throughout the week that use it.
In the tutorial below, I take you step by step through creating the golden fine art floral birthday card. I also have a supply list for purchasing anything you don’t already own.
The Fine Art Floral DSP and the Golden Garden Designer Specialty Acetate, have two patterns that line up exactly. They give a gold outline overlay to the flowers beneath. I’ve used one of them for this card. Hold the two matching patterns together tightly and cut them as one to achieve a similar effect. Please note that there is a clear plastic cover protecting the acetate that needs to be peeled off before completing your project.
From tomorrow you’ll have the chance to choose a free Sale-a-bration product with every £45 you spend.
Colour Combo
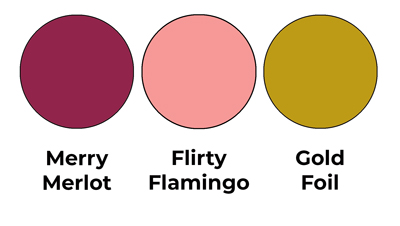
The colour combo mixes Merry Merlot, Flirty Flamingo and Gold Foil.
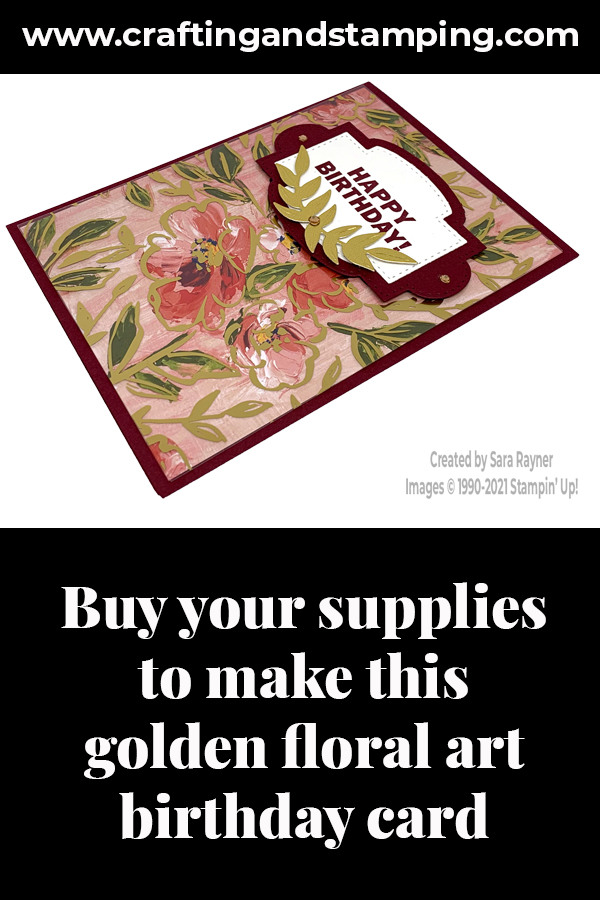
Golden Fine Art Floral birthday card tutorial
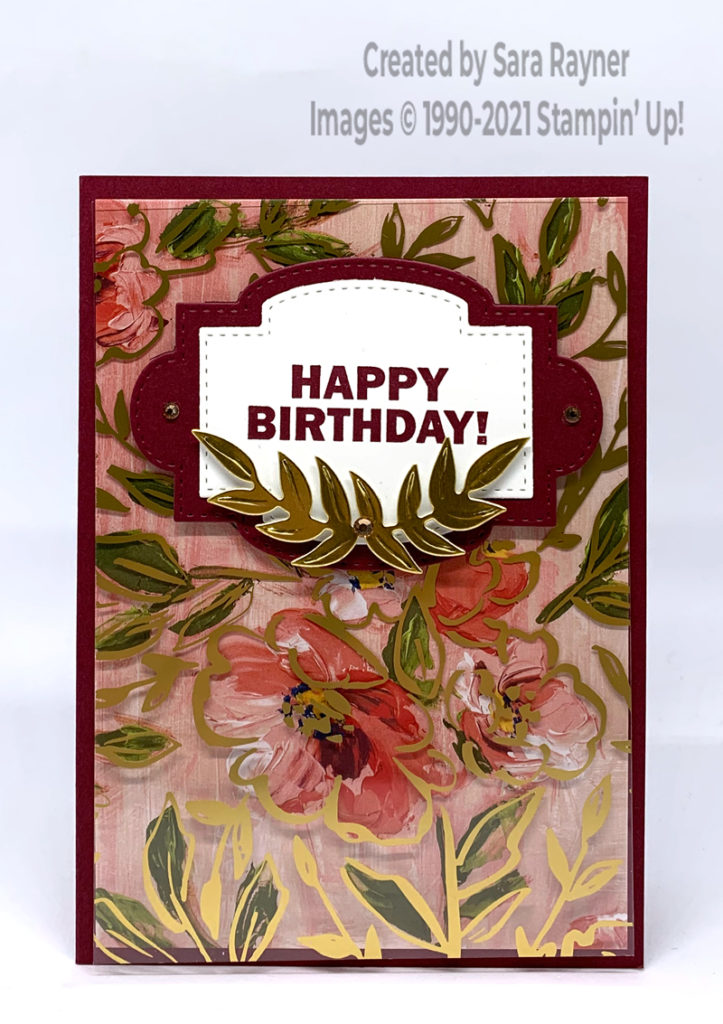
Start with an A6 portrait card of Merry Merlot. Mat with a layer of Fine Art Floral DSP. Using the Stitched So Sweetly set, die cut increasing size labels from Whisper White and Merry Merlot card. Stamp the birthday sentiment from the Approaching Perfection set onto the white label with Merry Merlot ink. Adhere the two labels together and pop up on the matched card front layer of Golden Garden Designer Specialty Acetate using dimensionals. Now apply adhesive (I recommend a “dry” adhesive such as Tear & Tape) on the reverse of the acetate, behind the labels so it won’t be seen and adhere direct to the card front. Using the Forever Flourishing set, die cut a leafy frame from Gold Foil and pop up on mini dimensionals at the base of the labels. Finish with Champagne Rhinestones.
Golden Fine Art Floral birthday card insert
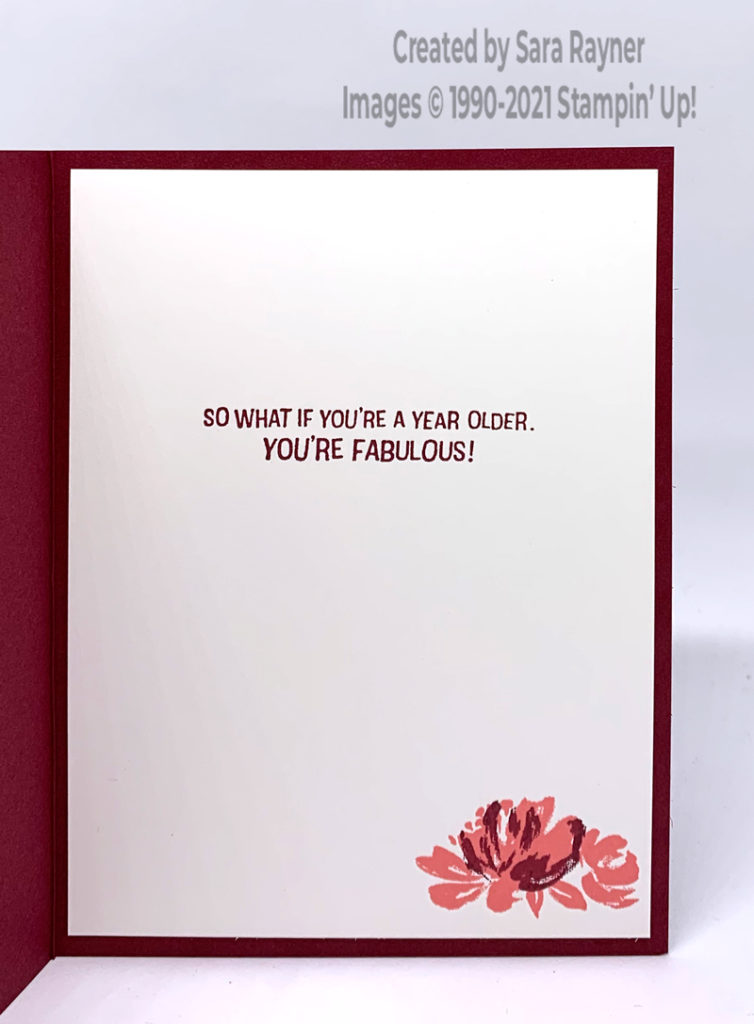
On the Whisper White insert, using Merry Merlot ink, stamp another sentiment from the Approaching Perfection set. In the lower right corner, stamp the smaller (2-step) flower from the Art Gallery set, using Flirty Flamingo ink for the first step and Merry Merlot for the second.
This project was one of the make & take projects for my Paper Dolls team meeting in December. Why don’t you take advantage of the very best deal coming out tomorrow and join my team, saving money and joining a fun crafting family.
Thanks for stopping by.
Sara xx
You can find some of the supplies for this Golden Fine Art Floral birthday card in my online shop straight away and the remaining ones will be available tomorrow.


0 Comments
Trackbacks/Pingbacks