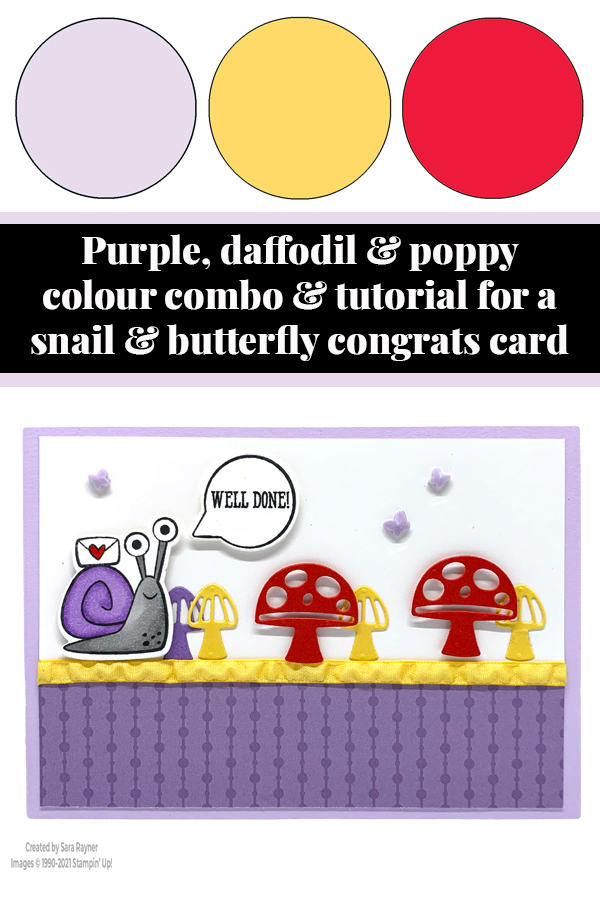
My tutorial today is for a snail & butterfly congrats card. Our new Snail Mail suite has its own small embellishments – hearts, but I liked the Butterfly Gems for filling a little negative space above the images. The butterflies are a little bigger than the hearts
In the tutorial below, I take you step by step through creating the snail & butterfly congrats card. I also have a supply list for purchasing anything you don’t already own.
Today’s card was another for one of my Paper Dolls team. This time congratulating them on their promotion – which gets them extra discount on their purchases going forward. I love sending these happy mail cards and celebrating with them!
If you’re struggling to find the exact pattern of the DSP that I used along the base, then that’s because it isn’t even out yet. It’s part of the DSP pack that you get for free when you join my team during Sale-a-bration. Want to know more? Let’s have a chat 😊
Colour Combo
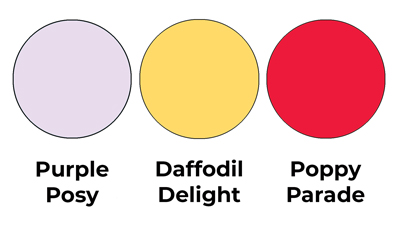
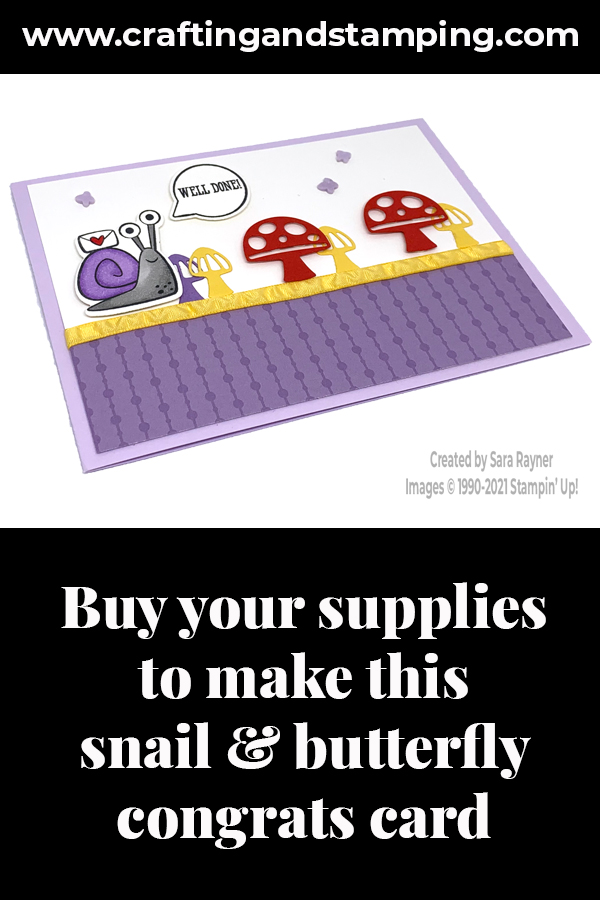
The colour combo mixes Purple Posy, Daffodil Delight and Poppy Parade, plus a little Highland Heather.
Snail & butterfly congrats card tutorial
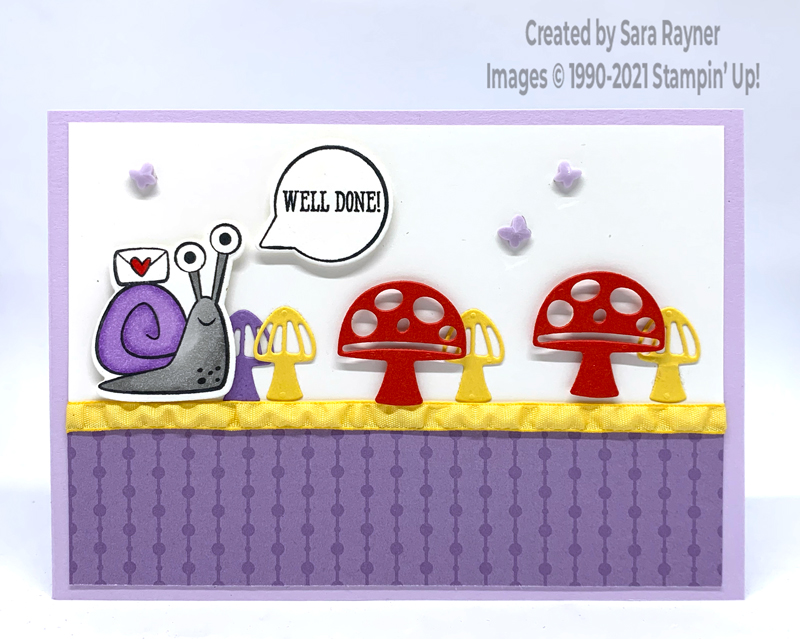
Start with an A6 landscape card of Purple Posy. Cut a card front layer of Basic White and mat the lower third with Highland Heather DSP. Wrap Daffodil Delight ribbon over the top of the DSP and secure on the reverse before adhering direct to the card front.
Using Memento Black ink, stamp the letter carrying snail and the speech bubble from the Snailed It stamp set onto scraps of Basic White card. Die cut out with the matching Snail dies. Colour the snail with Blends and stamp a sentiment from Well Said into the speech bubble with more Memento Black ink. Pop both up on the card front with mini dimensionals. Die cut small toadstools from scraps of Highland Heather and Daffodil Delight card and adhere them direct to the card front just above the ribbon.
Die cut two of the larger toadstool from Poppy Parade card and pop up on the card front with slivers of dimensionals. Finish with a trio of Butterfly Gems.
Snail & butterfly congrats card insert
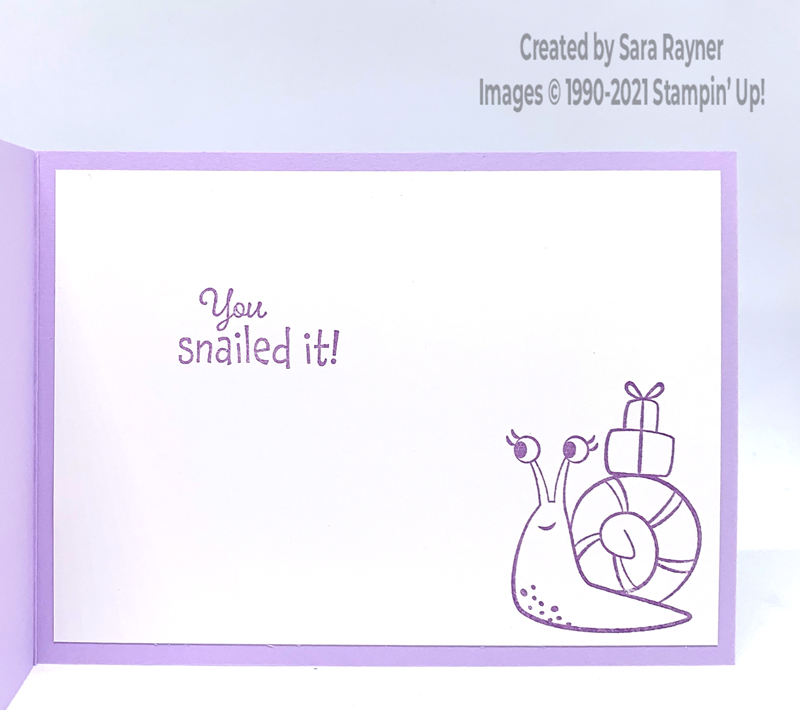
On the Basic White insert, using Highland Heather ink, stamp a sentiment and an image from the Snailed It set.
Thanks for stopping by.
Sara xx
Buy the supplies for this snail & butterfly congrats card in my online shop.
Reminder – you can now choose a free Sale-a-bration product with every £45 you spend.


0 Comments
Trackbacks/Pingbacks