Please note that there is still time to benefit from our Sale-a-bration and qualify for free products until 28 February. Purchasing the Easter Bunny bundle (saving 10%), together with the Rain or Shine Specialty DSP would qualify you for a Level 1 Sale-a-bration freebie.
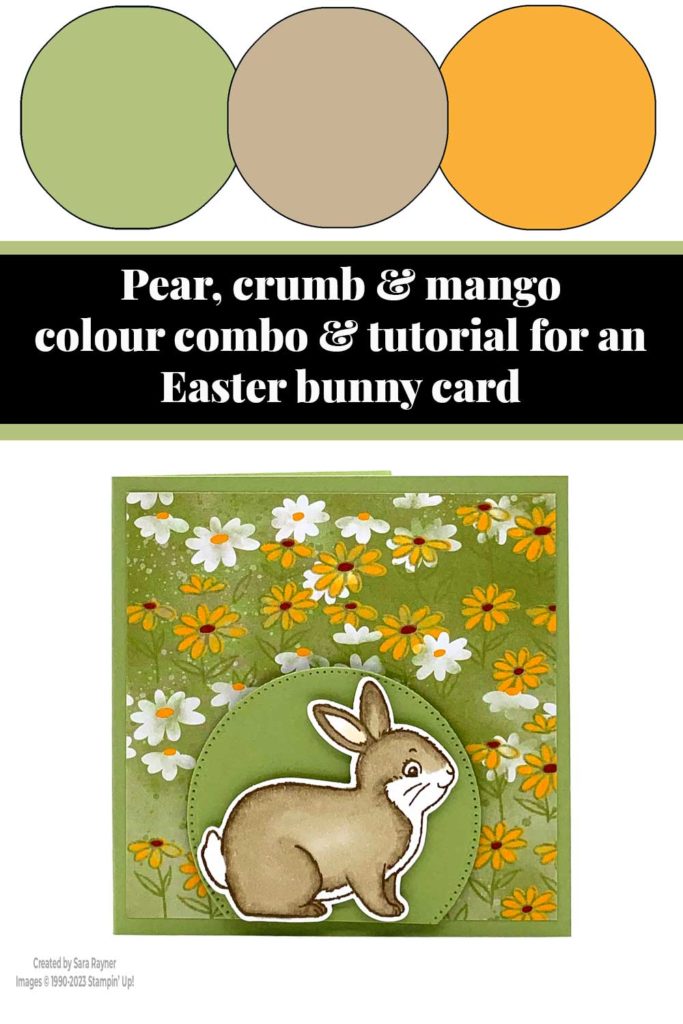
Colour Combo
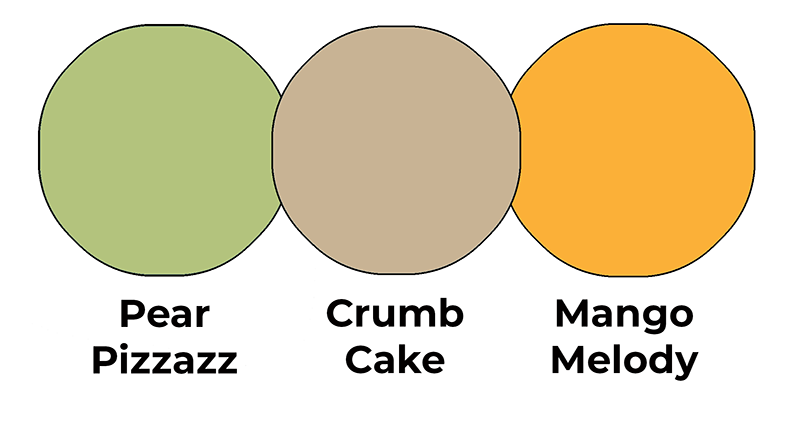
This colour combo mixes Pear Pizzazz, Crumb Cake and Mango Melody.
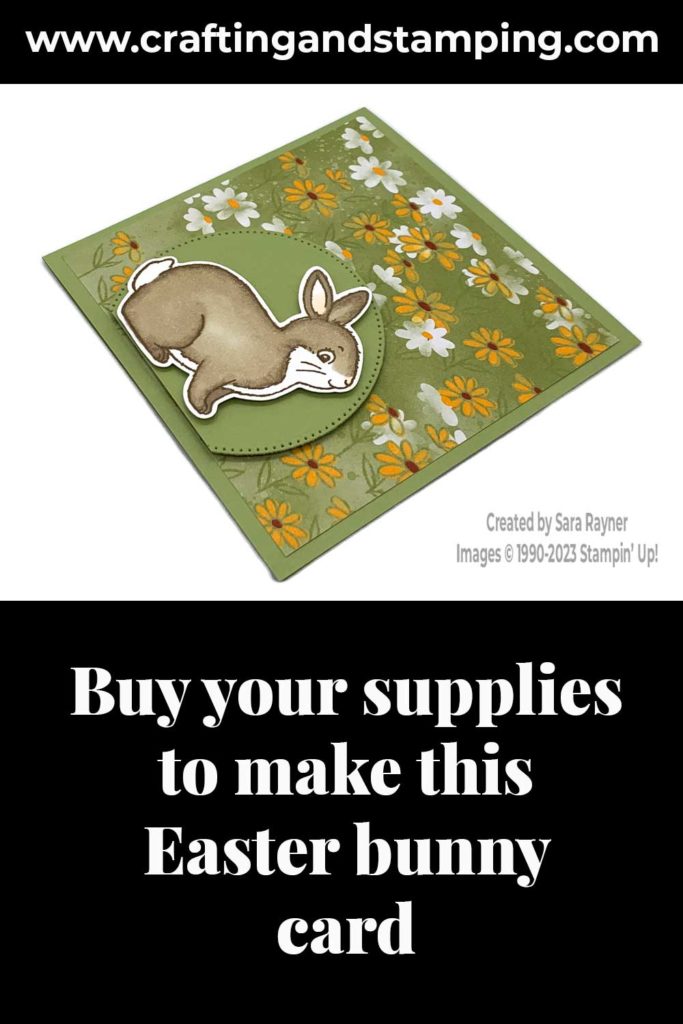
Easter bunny card
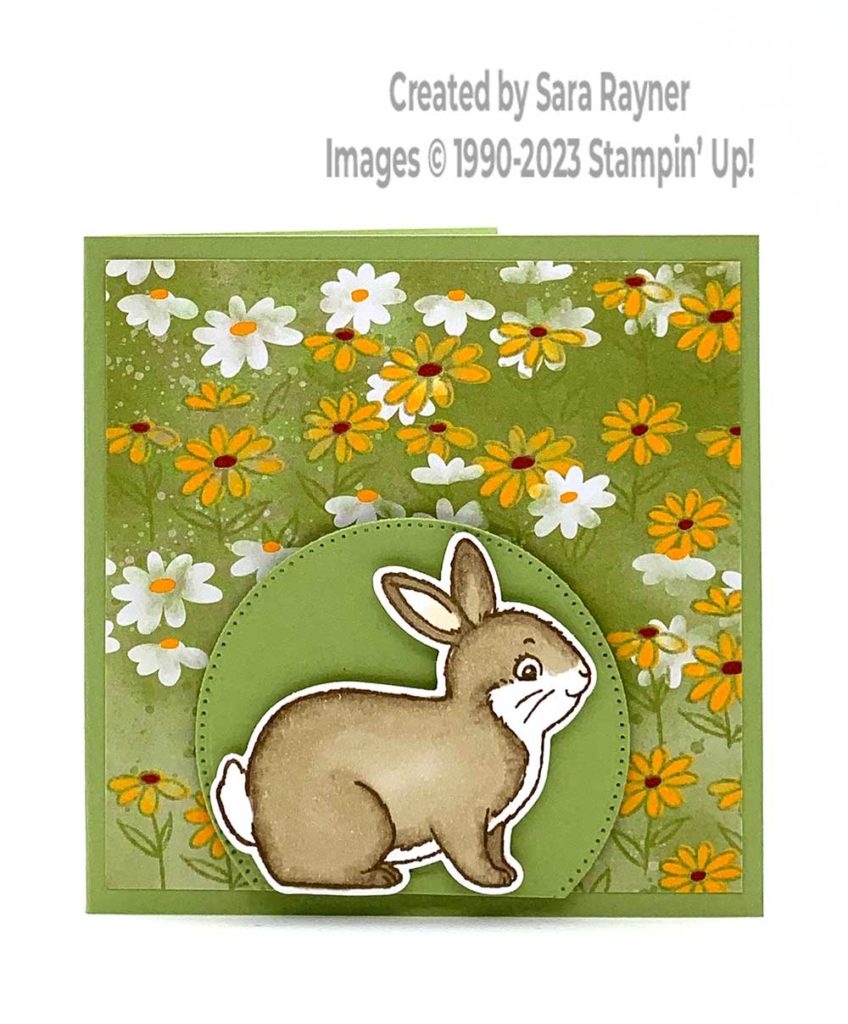
Start with a small square (4″ x 4″) card of Pear Pizzazz. Mat with a 3-3/4″ x 3-3/4″ card front layer of Rain or Shine Specialty DSP. Using Soft Suede ink (for a softer image), stamp the “sentiment”on all fours” bunny (this is the one that will punch out) from Easter Bunny set onto a scrap of Basic White card. Colour the bunny in with Crumb Cake and Petal Pink Stampin’ Blends, leaving some areas completely white. I used Dark Crumb Cake to trace around most of the edges, the outer ears and the paws. Using Light Crumb Cake I then coloured in the rest using tiny circles to draw in and blend the darker colour. Just a few strokes of Light Petal Pink were used to colour in the front facing ear and the nose. Punch out the coloured bunny with the Easter Bunny punch.
Using the Stylish Shapes dies, die cut a stitched circle large enough for the bunny, from Pear Pizzazz card. Trim a tiny edge from the circle for the bunny to “sit on”. Pop the bunny up in the circle with dimensionals. Pop the bunny and circle up on the card front base with dimensionals.
Easter bunny card insert

On the Basic White insert, using Soft Suede ink, stamp a sentiment from the Easter Bunny set. Add a border of Rain or Shine Specialty DSP down the right side.
Thanks for stopping by.
Sara xx
Buy the supplies for this Easter bunny card in my online shop.


0 Comments