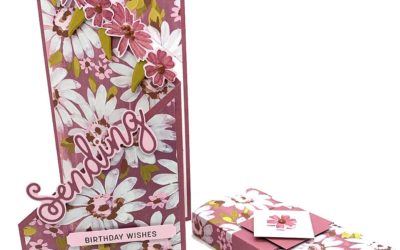
I shared the recipe for the decorated box here and now here’s the tutorial showing how to create a flat-bottomed box from the petal cone die.
 1. Die cut two of the petal cone pieces from your chosen card using the Big Shot and the Crease Pad.
 2. Fold each die cut piece in half, line up the score line at the base of the semi-circle with the 3″ mark on the paper cutter and trim off the point of the cone using the orange cutting blade.
 3. Line up the score line at the base of the semi-circle with the 2″ mark on the paper cutter and score using the black scoring blade.

4. Open out each cut and scored piece. Cut along the vertical centre scoreline from the base as far as the intersecting horizontal scoreline. Trim off the tabbed fold at the base (as on the right hand side in this picture). Repeat with the other piece. Decorate as preferred.
 5. Using Sticky Strip or Multipurpose Liquid Glue, adhere the tab of one piece to the main side of the other piece. Fold the two outer sides into the centre (right side out) to adhere the box together fully.
 6. Using your preferred adhesive, apply it to the outside outer edge of one of the base flaps, fold in to the centre and press the opposite flap down on top of it (this ensures that no adhesive is exposed on the inside of your box base). Apply adhesive to the inside outer edges of the two remaining base flaps and fold them into the centre. Fold the petals of the box lid together, overlapping them to secure. Finish decorating your box as preferred.


Hi, really pleased you put the tutorial on, I have just ordered the cone die and would have had to work it out from sample you gave all of us. It was great getting together last week for the display book, it would be nice if we could do it again before next year, i am sure we could think of a good reason!!!
Thanks Beverley