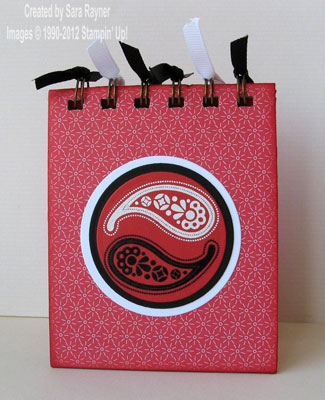
Do you recognise which set today’s stamp comes from? They’re actually the same single stamp (stamped twice) from the Spiced Paisley set and I’d had in mind that it would be fun to turn it into a yin and yang symbol from the first time I saw the set. Finally I’ve got around to it over three months later!

Recipe
Stamp sets: Spiced Paisley (W127155 or C125817)
Cardstock: Poppy Parade (121694), Basic Black (121688), Whisper White (106549)
Ink: Poppy Parade (119782), Versamark (102283)
DSP: Pocketful of Posies (122354) (free with £45 order during April)
1/4″ Grosgrain Ribbon: Basic Black (109027), Whisper White (109025)
Other: Black EP (109133), White EP (109132)
Tools: Big Shot (113439), Heat Tool (110197), Sponge Daubers (102892), Distressing Essentials (118762), Stamp-a-ma-jig (101049)
Non-SU: Circle dies, Bind-it-all
The covers of the note holder were made with some chipboard backing that came protecting a pack of Quick Accents last year and which I hadn’t thrown away (you just know it will come in handy sometime, lol). They were covered on one side with Poppy Parade card and on the other with the Poppy Parade paper from the Pocketful of Posies DSP pack. After adding the holes with the Bind-it-all machine, the edges were finished with the file and sanding block from the Distressing Essentials kit and then sponged with Poppy Parade ink. The medium paisley teardrop from the Spiced Paisley set was stamped in Versamark ink onto Poppy Parade card and heat embossed with Black EP. Using the Stamp-a-ma-jig to position the second teardrop correctly, it was also stamped with Versamark but then heat embossed with White EP. The Yin and Yang were die cut with a circle and then matted onto increasingly larger die-cut circles of Basic Black and Whisper White card. These were all adhered flat to the front of the notepad cover.

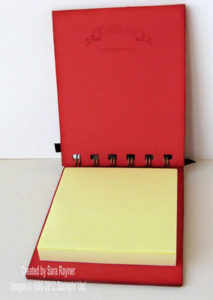
Using Poppy Parade ink (Versamark ink would also have worked for a similar watermark look), the handmade sentiment and copyright logo were stamped on the inside. The holder was then bound together with the post-its adhered to the back inside and Basic Black and Whisper White ribbons were tied onto the wire coils.
I’ll have this little notebook for sale on our stand at Langsett Barn Craft Fair on Sunday if you’d like to pop by and see us.
Don’t forget that the Spring Mini Catalogue comes to an end at the end of this month. Some of the items may make it through to the main catalogue later in the year, but not all of them will and we don’t know which ones will go and which will stay. If you’ve been meaning to treat yourself to the Simply Adorned Jewellery or have your eye on a particular stamp set, then there’s just a few weeks left to guarantee getting hold of it.
Thanks for stopping by.
Sara xx


0 Comments