Today’s tutorial is for a True Love Freesia card. Throughout this week I’m combining the True Love DSP (available now) with sneak peeks of the new 2021-2023 In Colors (coming 4 May). Today’s card uses the Fresh Freesia card, ink, ribbon and Loose Flower Flourishes. We will also have Blends, Markers and DSP in each of the In Colors when they launch and I’ll have an In Color Club to help you spread the cost of getting each of the new colours.
In the tutorial below, I take you step by step through creating the True Love Freesia card. I also have a supply list for purchasing anything you don’t already own. Although you can’t order the new In Colors until 4 May you can easily switch another colour for the Fresh Freesia.
For more sneak peeks you can check out the video as I shared the unboxing of my pre-order from the 2021 Annual Stampin’ Up! catalogue.
If you’d also like to be able to pre-order from the new catalogue and get a discount on your future purchases then please have a think about joining my team and get in touch if you’d like to know more.
Colour Combo
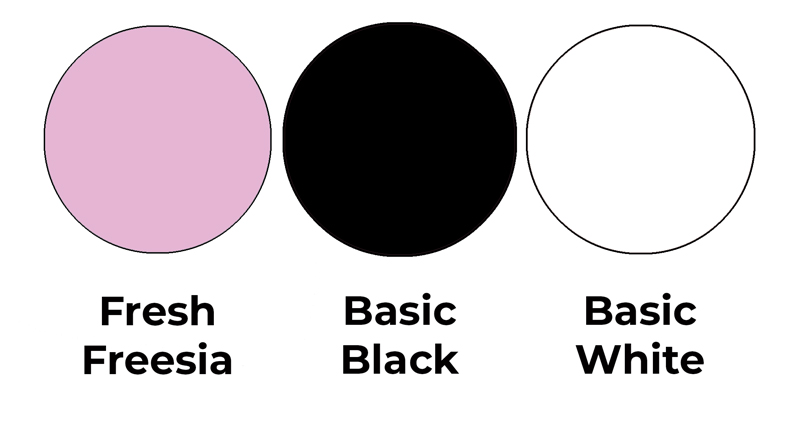
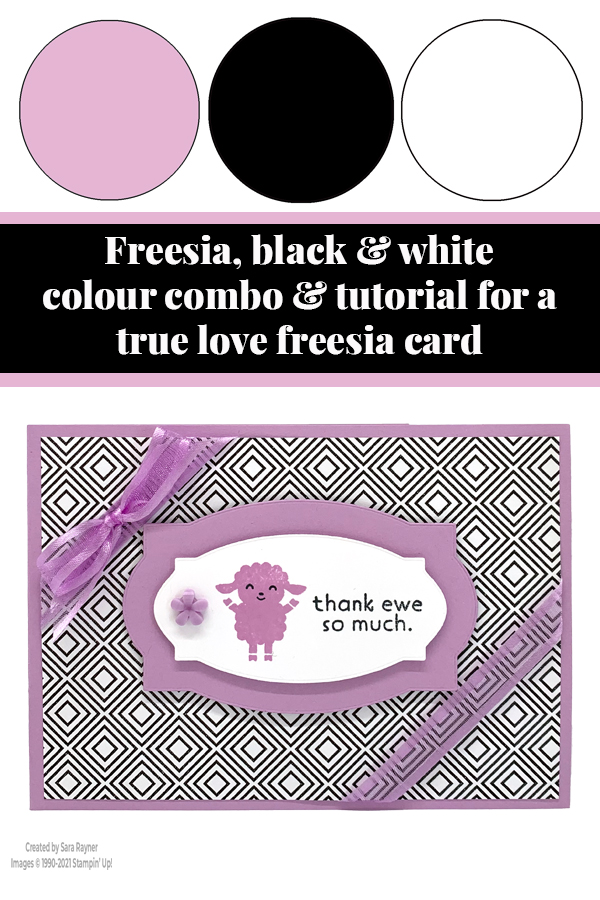
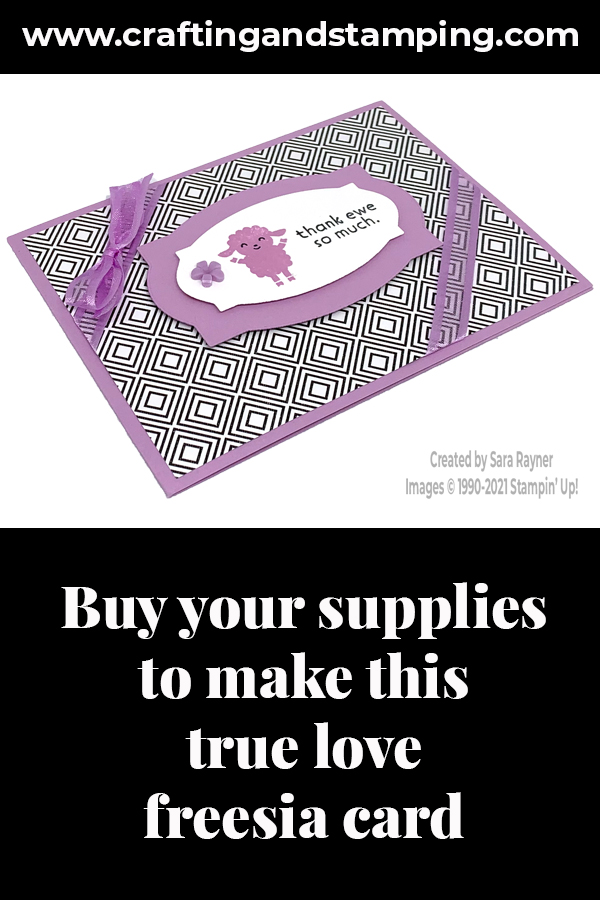
The colour combo mixes Fresh Freesia with simple black and white.
True Love Fresh Freesia thank you card
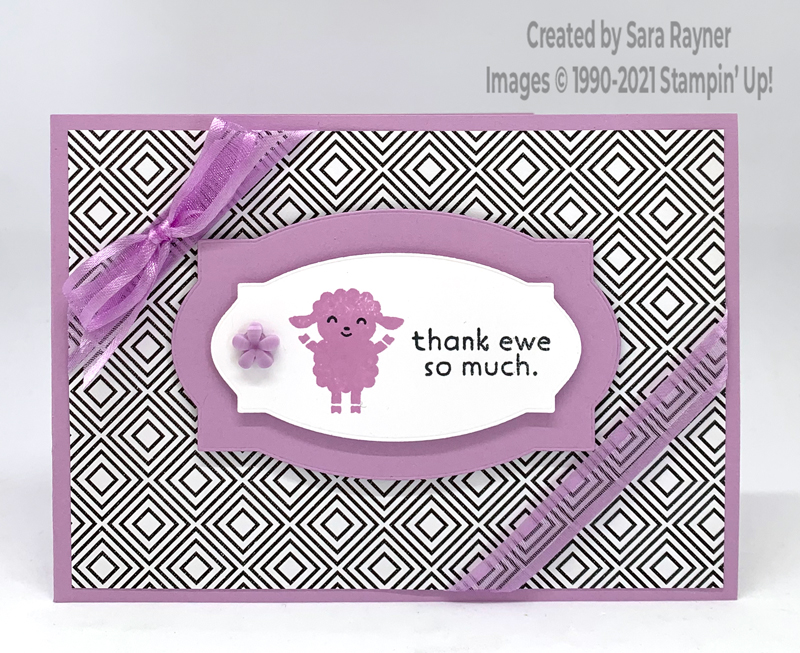
Start with an A6 landscape card of Pale Papaya. Cut a card front layer of True Love DSP. Wrap Fresh Freesia ribbon diagonally around two opposite corners of the DSP before adhering direct to the card front. Add a bow of the same ribbon to the centre of the top ribbon.
Die cut two different size labels from Fresh Freesia and Basic White card using the Hippo & Friends dies. Using Memento Black ink, add a sentiment from the Hippo Happiness set to the white label. Add a sheep from the same set using the Fresh Freesia ink. Allow the ink to dry and then add a smiley face over the top with the Memento Black ink. Pop the labels up on the card front with dimensionals. Finish with one of the Loose Flower Flourishes.
True Love Fresh Freesia thank you card insert
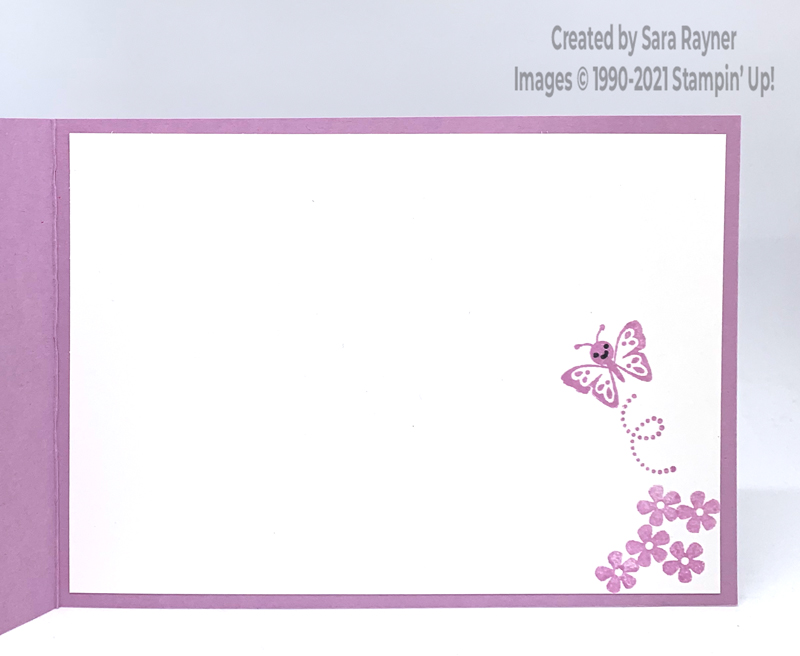
On the Basic White insert, stamp the tiny flower from the Hippo Happiness set repeatedly in the bottom right of the insert with Fresh Freesia ink. Add the butterfly and trail over the top with the same ink and once dry, finish with a tiny face in Memento Black ink.
Thanks for stopping by.
Sara xx
Buy the supplies for this True Love Freesia card in my online shop.


0 Comments
Trackbacks/Pingbacks